Creating a Form
If you have access to multiple websites, make sure you are adding the form while in the correct website.
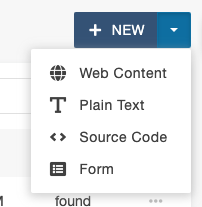
Select Assets from the Content tab.

Click the blue New button. Click Form. Note: If you don't see the Form option, contact webservices@k-state.edu.
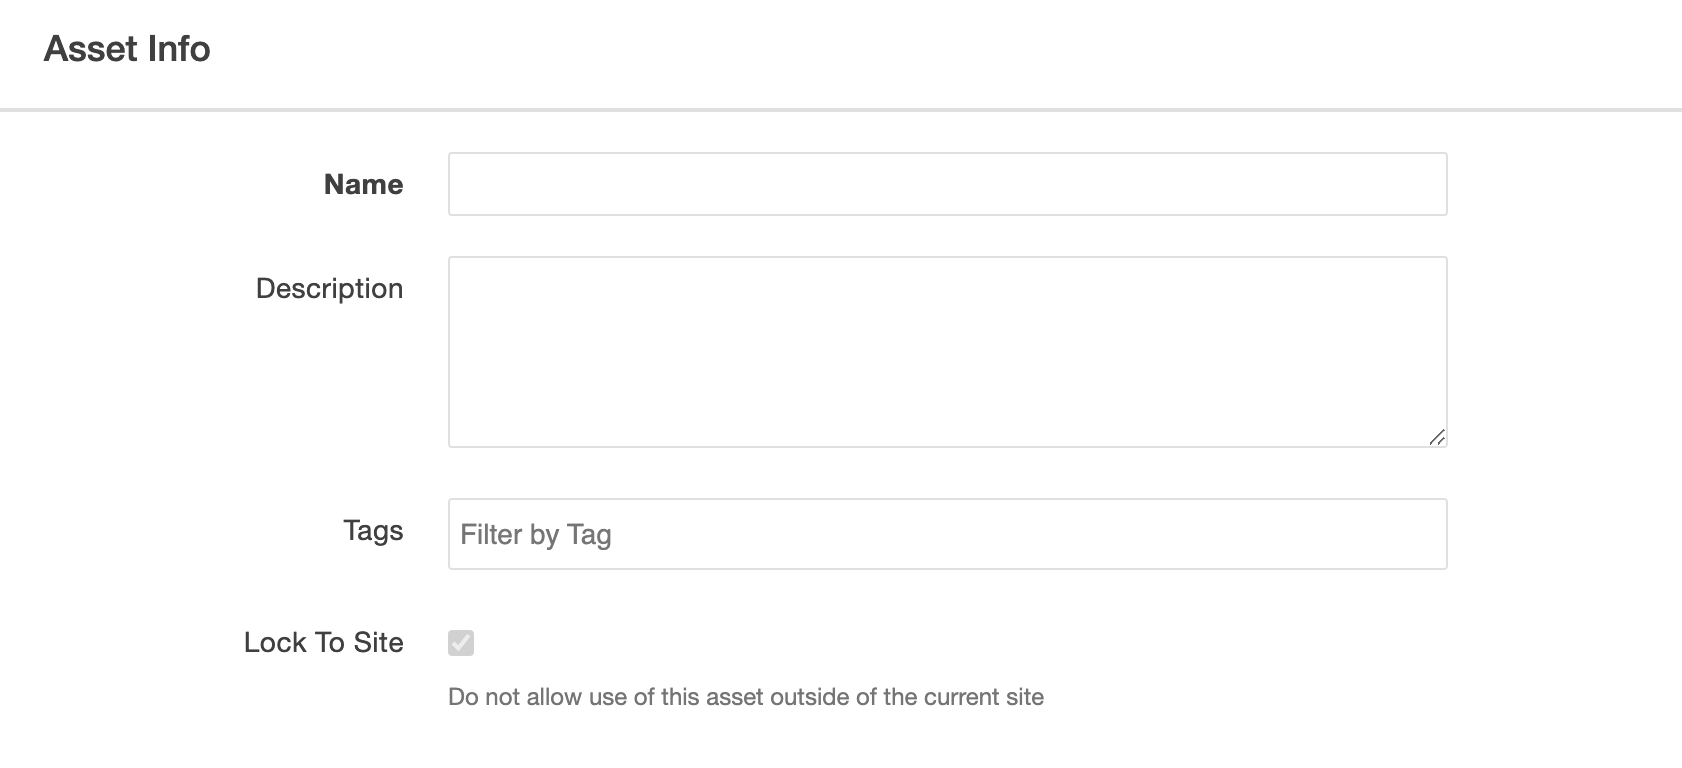
Fill out the Asset Info
- Name: short, clear name
- Description: purpose of form
- Tags: keywords to help find the form
- Lock to site: leave as default setting
Leave the Access Settings as default.
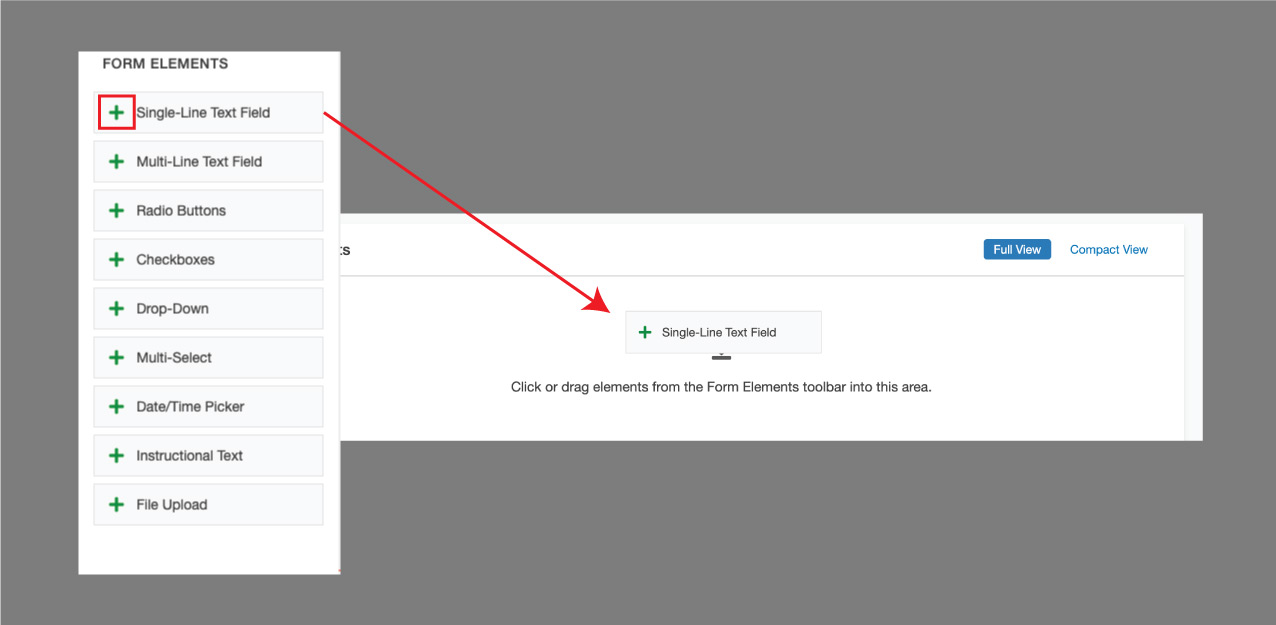
Adding form elements
The Form Elements in the left column are the fields for your form. Click the green plus sign or drag and drop to add Form Elements to the Elements block. See details and examples of Form Elements.
Collecting and emailing the form data
When actively collecting form data, you can have the system store the information in a database within the CMS and/or send you an email containing the submission information.
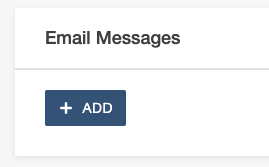
To send an email to one or more addresses when the form is submitted using Email Messages:
Click the blue Add button.
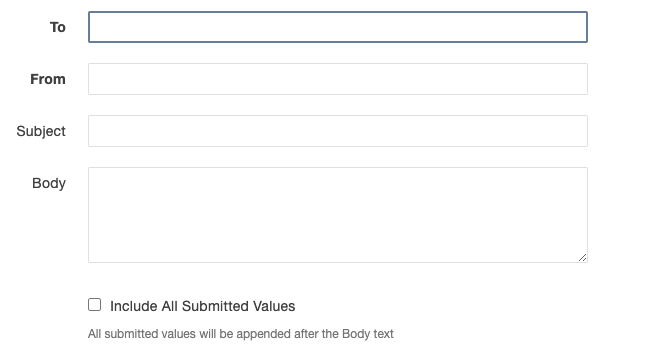
Type or copy email addresses in the To field that you want to receive the email. Add more than one email address by putting a semicolon (;) between them.
The From field can be a departmental email or the email you want the form to come from. It must be a valid email address or the form will submit, but not send the email.
To send the form from the email of the submitter, put the Name of the email input in the From field using the syntax {{Name}}.
- Enter a Subject that reflects the content of the email.
- Enter Body text.
Emailing form content
-
- Form content can be automatically appended after the Body text by checking the Include all submitted values checkbox.
- Body text can also be customized to include form fields within the content. To add the form field content to the email message dynamically, list each field Name in the Body section using the syntax {{Name}}. After typing the first two curly brackets, the system will search the field names and provide a drop down list to select from.
Repeat the process of adding an email message to send a separate message with a different Body message.
Note: You can dynamically add content from single-line text fields using the element Name by typing {{Name}}. The CMS will open a drop down below the text box with the options from the form. Ex: In the subject line, you could type "Hello, {{firstname}}" if you have a First Name element with the Name firstname.
Collecting and saving the form data in a database
The CMS forms will have the box checked to save the results in the database by default. It is not recommended that you uncheck this option unless you have another storage option setup.

To view and download the submissions:
Navigate to the Form Submissions tab above the Form Editor window.
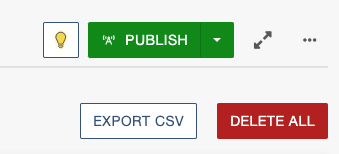
On the right-hand side of the window, click the white Export CSV button.
Open the CSV file in Excel, Numbers or Google Sheets to see your data.